
Photographic Documentation of Apartment Condition — Why It Matters So Much
Learn why photographic documentation of your rental property is essential for protecting your investment. Practical tips on what, when, and how to photograph to avoid disputes and ensure smooth tenant transitions.
29 Sep 2026 · 9 min · Zespół Brokik
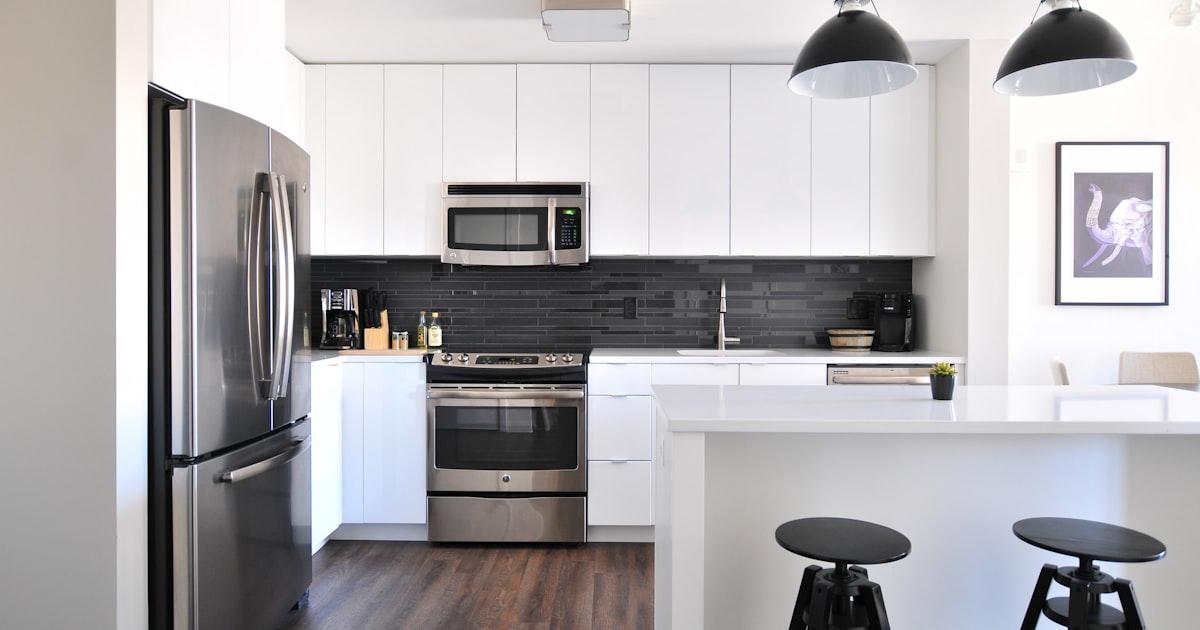
Photographic Documentation of Apartment Condition — Why It Matters So Much
In the world of property rental, words can be subjective. What one person describes as "minor wear and tear" another might call "significant damage." This fundamental ambiguity is precisely why photographic documentation of your rental property\'s condition is not just recommended — it is absolutely essential. A comprehensive photo record serves as an objective, time-stamped reference that can prevent disputes, protect your financial interests, and streamline the entire rental management process.
Despite its importance, many landlords still treat photographic documentation as an afterthought — taking a few hasty snapshots on their phone during a rushed handover. This article will explain why a systematic approach to visual documentation can save you thousands of zlotys and countless hours of frustration.
The Legal Importance of Photo Documentation
In Poland, the relationship between landlord and tenant is governed by the Civil Code and the Tenant Protection Act (Ustawa o ochronie praw lokatorów). While these laws establish frameworks for deposit deductions and damage claims, they also place the burden of proof on the party making the claim. This means that if you want to deduct from a tenant\'s security deposit for damage, you need to prove:
- The condition of the property at the time the tenant moved in
- The condition of the property at the time the tenant moved out
- That the difference constitutes damage beyond normal wear and tear
Without photographic evidence, these claims often become your word against the tenant\'s — a situation that rarely resolves satisfactorily for either party. Courts and mediators consistently give greater weight to visual evidence than verbal testimony, making photos your strongest ally in any potential dispute.
What to Photograph: A Comprehensive Checklist
Effective documentation requires a systematic approach. Here is a comprehensive checklist of what to capture:
- Every room from multiple angles: Take wide shots from each corner of every room to provide complete coverage. These overview shots establish the general condition and layout.
- Walls, ceilings, and floors: Document the condition of all surfaces. Pay special attention to any existing marks, scratches, stains, or damage.
- Windows and doors: Photograph each window and door, including close-ups of locks, handles, hinges, and seals.
- Kitchen details: Counter surfaces, appliances (including their serial numbers or condition labels), cabinets inside and out, sink, faucet, and any visible plumbing.
- Bathroom fixtures: Toilet, shower/bathtub, sink, mirror, tiles, grouting condition, and any signs of moisture or mold.
- All furniture and equipment: Each piece of furniture, appliance, and fixture that is included in the rental should be individually photographed.
- Meter readings: Close-up photos of all utility meters (water, electricity, gas) showing the current readings clearly.
- Keys and access devices: Photograph all keys, remotes, access cards, and parking devices handed over.
- Exterior areas: If the rental includes a balcony, terrace, parking space, or storage unit, document these as well.
When to Take Photos
Documentation is not a one-time task. A thorough approach involves capturing the property\'s condition at multiple critical moments:
- Before listing the property: Document the property in its ready-to-rent condition. These photos serve as your baseline.
- At check-in (move-in): Take photos together with the tenant, ideally on the same day as the handover protocol signing. Having the tenant present eliminates future claims that the photos were taken at a different time or were manipulated.
- During periodic inspections: If your lease allows for periodic property inspections (as it should), document the condition each time you visit.
- After reported issues: When a tenant reports maintenance issues, request photos from them and take your own when you visit for repairs.
- At check-out (move-out): This is the most critical moment. Take comprehensive photos following the same checklist used at check-in, enabling direct comparison.
Technical Tips for Better Documentation
The quality of your photos matters as much as their comprehensiveness. Follow these technical guidelines to ensure your documentation is as effective as possible:
- Use good lighting: Open all blinds and turn on all lights. Use your phone\'s flash for dark corners and under-cabinet spaces. Poor lighting can obscure damage and make photos unreliable as evidence.
- Enable timestamps: Ensure your camera or phone records the date and time in the photo metadata. Some landlords use timestamp camera apps that embed the date visibly in the image.
- Shoot in high resolution: Always use the highest resolution available. You may need to zoom in on details later, and low-resolution photos lose clarity when enlarged.
- Include reference objects: When photographing damage, include a common object (a coin, a ruler) for scale. A scratch might look minor in a wide shot but prove significant when its actual size is visible.
- Take both wide and close-up shots: Wide shots establish context (which room, which wall), while close-ups reveal detail. Always pair them.
- Be consistent: Try to photograph from the same positions at check-in and check-out. This makes comparison straightforward and differences immediately apparent.
Organizing and Storing Your Documentation
Taking hundreds of photos is only useful if you can find and reference them when needed. Effective organization is critical:
- Folder structure: Create a clear folder structure organized by property, then by date and event type (check-in, inspection, check-out).
- Cloud backup: Always maintain at least one cloud backup. Photos stored only on a phone or local drive are at risk of loss.
- Do not edit originals: Never crop, filter, or edit original photos. Edited images can be challenged in disputes. If you need to highlight something, create annotated copies while keeping originals intact.
- Link to protocols: Connect your photos to the relevant handover protocol or inspection report, so the visual evidence and written documentation support each other.
Property management platforms like Brokik make this process significantly easier by providing integrated documentation features. When you create a check-in or check-out protocol in Brokik, you can attach photos directly, creating a permanent, organized record linked to the specific property, tenant, and date. This eliminates the chaos of managing thousands of photos in generic cloud storage folders.
Common Mistakes in Photo Documentation
Even landlords who understand the importance of photo documentation often make avoidable mistakes:
- Not enough photos: The most common mistake is simply not taking enough. You cannot over-document. It is far better to have photos you never need than to need photos you never took.
- Forgetting hidden areas: Inside cabinets, behind appliances, under sinks, tops of wardrobes — these areas are often overlooked but frequently where damage or dirt accumulates.
- Skipping the exterior: Balconies, storage rooms, parking spaces, and shared areas within the tenant\'s responsibility should all be documented.
- Not involving the tenant: Taking photos alone, without the tenant present, weakens their evidentiary value. The tenant can later claim the photos do not accurately represent the property\'s condition at handover.
- Delayed documentation: Taking photos days after the actual handover creates a time gap that can be exploited in disputes. Always document on the day of the handover.
Video as a Complement to Photos
While photos remain the gold standard for documentation, video walkthroughs can serve as a valuable complement. A continuous video recording of each room provides context that individual photos may miss and is harder to dispute regarding timing or staging. Consider recording a brief video walkthrough in addition to your photo documentation, especially for higher-value properties.
How Photo Documentation Prevents Disputes
The mere existence of thorough documentation often prevents disputes from arising in the first place. When tenants know that the property has been comprehensively photographed at check-in, they understand that any damage they cause will be clearly attributable. This awareness acts as a natural deterrent against carelessness.
Furthermore, when disputes do arise, having clear before-and-after documentation typically leads to quick resolution. Presented with photographic evidence, most tenants will accept reasonable deductions from their security deposit without escalation. In the rare cases that reach mediation or court, judges consistently favor parties who present organized, timestamped visual evidence.
Integrating Documentation into Your Workflow
The key to consistent documentation is making it a non-negotiable part of your rental workflow. With platforms like Brokik, you can build documentation directly into your check-in and check-out processes, ensuring nothing is missed. The platform\'s protocol system prompts you to capture all necessary elements, and the integrated storage keeps everything organized and accessible when you need it.
Summary
Photographic documentation is one of the simplest yet most impactful practices in professional property rental management. It protects your investment, prevents disputes, speeds up tenant transitions, and provides legal security. By following a systematic approach — knowing what to photograph, when to photograph, and how to organize your records — you transform a few minutes of effort at each handover into a powerful safeguard for your property. Combined with a management platform like Brokik that integrates documentation into your workflow, thorough photo records become easy, consistent, and always at your fingertips when you need them most.
Run your rentals from one place
See how it worksRelated articles

11 Sep 2026 · 10 min
Seasonal Property Maintenance — Autumn and Winter
Prepare your rental property for the cold season. A comprehensive guide to autumn and winter maintenance that will help you avoid costly repairs and keep tenants satisfied.
24 Aug 2026 · 9 min
Managing Warranties and Complaints in a Rental Apartment
Learn how to effectively manage warranties and handle complaints in rental properties. Practical advice on documentation, legal obligations, and keeping tenants satisfied.
6 Aug 2026 · 10 min
How to Prepare for the Academic Season — Renting to Students
A complete guide to preparing your rental property for the student season. From timing your marketing and setting the right price to furnishing, lease structures, and managing student tenants effectively.
Your entire tenancy in one place
Manage your rentals more easily with Brokik - agreements, settlements and documents in one place.